一、调整项目的结构,导入必要的素材
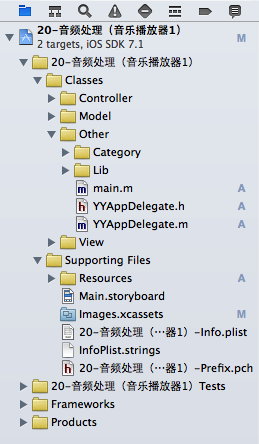
调整后的项目结构如下:
二、新建两个控制器
(1)新建一个控制器,用于展示音乐文件列表界面,其继承自UITableViewController

(2)新建一个控制器,用于展示播放界面,其继承自UIViewController

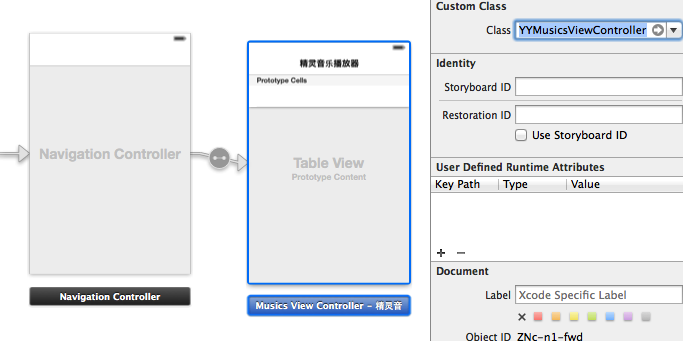
(3)在storyboard中,把之前的控制器删除,换上一个导航控制器,设置tableViewController与之前新建的控制器类进行关联
三、音乐文件列表控制器中基本界面的搭建
(1)新建一个音乐文件的模型
根据plist文件建立模型:

音乐模型的代码如下:
YYMusicModel.h文件
//
// YYMusicModel.h
// 20-音频处理(音乐播放器1)
//
// Created by apple on 14-8-13.
// Copyright (c) 2014年 yangyong. All rights reserved.
//
#import <Foundation/Foundation.h>
@interface YYMusicModel : NSObject
/**
* 歌曲名字
*/
@property (copy, nonatomic) NSString *name;
/**
* 歌曲大图
*/
@property (copy, nonatomic) NSString *icon;
/**
* 歌曲的文件名
*/
@property (copy, nonatomic) NSString *filename;
/**
* 歌词的文件名
*/
@property (copy, nonatomic) NSString *lrcname;
/**
* 歌手
*/
@property (copy, nonatomic) NSString *singer;
/**
* 歌手图标
*/
@property (copy, nonatomic) NSString *singerIcon;
@end
(2)使用字典转模型的第三方框架
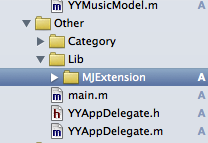
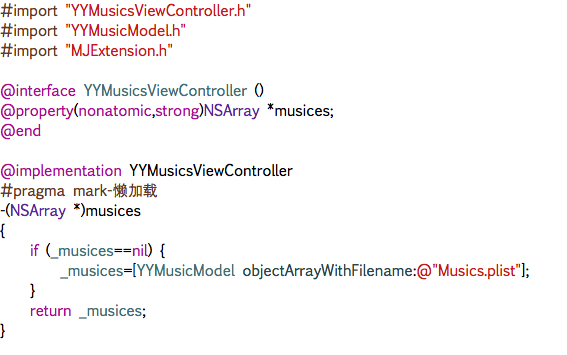
部分相关代码如下:
此时的界面显示效果为:
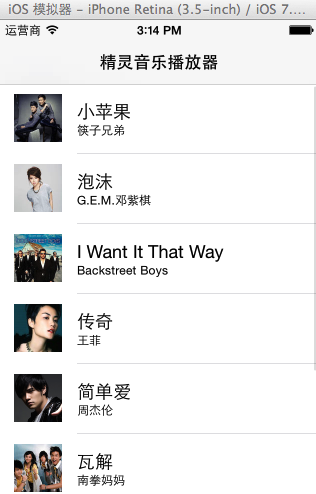
(3)添加一个UIimageView的分类,调整歌手的头像(正方形——>圆形)
分类的实现代码如下:
UIImage+YY.h文件
#import <UIKit/UIKit.h>
@interface UIImage (YY)
+ (instancetype)circleImageWithName:(NSString *)name borderWidth:(CGFloat)borderWidth borderColor:(UIColor *)borderColor;
@end
UIImage+YY.m文件
#import "UIImage+YY.h"
#import <objc/message.h>
@implementation UIImage (YY)
+ (instancetype)circleImageWithName:(NSString *)name borderWidth:(CGFloat)borderWidth borderColor:(UIColor *)borderColor
{
// 1.加载原图
UIImage *oldImage = [UIImage imageNamed:name];
// 2.开启上下文
CGFloat imageW = oldImage.size.width + 2 * borderWidth;
CGFloat imageH = oldImage.size.height + 2 * borderWidth;
CGSize imageSize = CGSizeMake(imageW, imageH);
UIGraphicsBeginImageContextWithOptions(imageSize, NO, 0.0);
// 3.取得当前的上下文
CGContextRef ctx = UIGraphicsGetCurrentContext();
// 4.画边框(大圆)
[borderColor set];
CGFloat bigRadius = imageW * 0.5; // 大圆半径
CGFloat centerX = bigRadius; // 圆心
CGFloat centerY = bigRadius;
CGContextAddArc(ctx, centerX, centerY, bigRadius, 0, M_PI * 2, 0);
CGContextFillPath(ctx); // 画圆
// 5.小圆
CGFloat smallRadius = bigRadius - borderWidth;
CGContextAddArc(ctx, centerX, centerY, smallRadius, 0, M_PI * 2, 0);
// 裁剪(后面画的东西才会受裁剪的影响)
CGContextClip(ctx);
// 6.画图
[oldImage drawInRect:CGRectMake(borderWidth, borderWidth, oldImage.size.width, oldImage.size.height)];
// 7.取图
UIImage *newImage = UIGraphicsGetImageFromCurrentImageContext();
// 8.结束上下文
UIGraphicsEndImageContext();
return newImage;
}
@end
分类的使用:
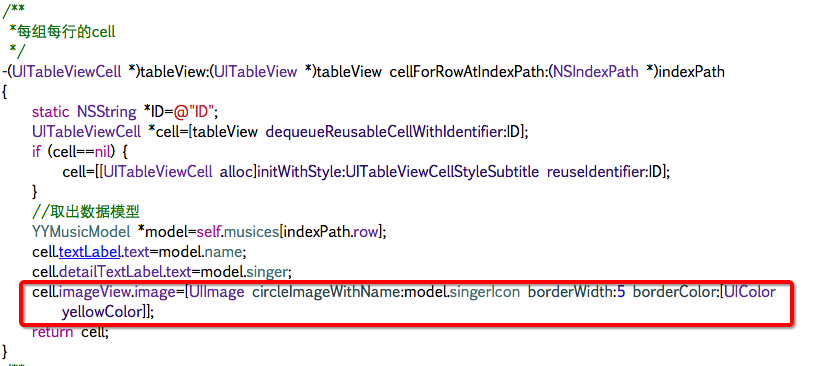
实现的效果:
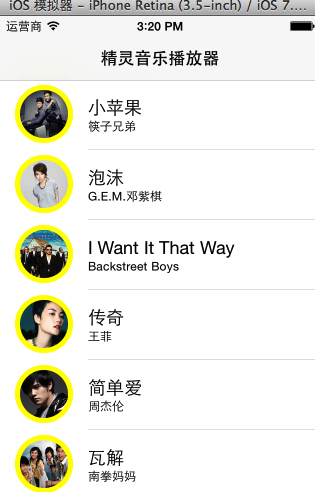
(4)推荐使用一个第三方框架,用来处理颜色
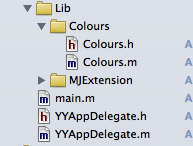
涉及的代码:

四、实现代码
YYMusicsViewController.m文件
//
// YYMusicsViewController.m
// 20-音频处理(音乐播放器1)
//
// Created by apple on 14-8-13.
// Copyright (c) 2014年 yangyong. All rights reserved.
//
#import "YYMusicsViewController.h"
#import "YYMusicModel.h"
#import "MJExtension.h"
#import "UIImage+YY.h"
#import "Colours.h"
@interface YYMusicsViewController ()
@property(nonatomic,strong)NSArray *musics;
@end
@implementation YYMusicsViewController
#pragma mark-懒加载
-(NSArray *)musics
{
if (_musics==nil) {
_musics=[YYMusicModel objectArrayWithFilename:@"Musics.plist"];
}
return _musics;
}
- (void)viewDidLoad
{
[super viewDidLoad];
}
#pragma mark - Table view data source
/**
*一共多少组
*/
-(NSInteger)numberOfSectionsInTableView:(UITableView *)tableView
{
return 1;
}
/**
*每组多少行
*/
-(NSInteger)tableView:(UITableView *)tableView numberOfRowsInSection:(NSInteger)section
{
return self.musics.count;
}
/**
*每组每行的cell
*/
-(UITableViewCell *)tableView:(UITableView *)tableView cellForRowAtIndexPath:(NSIndexPath *)indexPath
{
static NSString *ID=@"ID";
UITableViewCell *cell=[tableView dequeueReusableCellWithIdentifier:ID];
if (cell==nil) {
cell=[[UITableViewCell alloc]initWithStyle:UITableViewCellStyleSubtitle reuseIdentifier:ID];
}
//取出数据模型
YYMusicModel *model=self.musics[indexPath.row];
cell.textLabel.text=model.name;
cell.detailTextLabel.text=model.singer;
cell.imageView.image=[UIImage circleImageWithName:model.singerIcon borderWidth:1 borderColor:[UIColor skyBlueColor]];
return cell;
}
/**
* 设置每个cell的高度
*/
-(CGFloat)tableView:(UITableView *)tableView heightForRowAtIndexPath:(NSIndexPath *)indexPath
{
return 70;
}
/**
* cell的点击事件
*/
-(void)tableView:(UITableView *)tableView didSelectRowAtIndexPath:(NSIndexPath *)indexPath
{
//取消选中被点击的这行
[tableView deselectRowAtIndexPath:indexPath animated:YES];
}
@end
五、改进
对tableViewcell的代码进行封装:
实现:新建一个YYmusicCell类,继承自UITableViewCell。
封装代码如下:
YYMusicCell.h文件
//
// YYMusicCell.h
// 20-音频处理(音乐播放器1)
//
// Created by apple on 14-8-13.
// Copyright (c) 2014年 yangyong. All rights reserved.
//
#import <UIKit/UIKit.h>
@class YYMusicModel;
@interface YYMusicCell : UITableViewCell
+(instancetype)cellWithTableView:(UITableView *)tableView;
@property(nonatomic,strong)YYMusicModel *music;
@end
YYMusicCell.m文件
//
// YYMusicCell.m
// 20-音频处理(音乐播放器1)
//
// Created by apple on 14-8-13.
// Copyright (c) 2014年 yangyong. All rights reserved.
//
#import "YYMusicCell.h"
#import "YYMusicModel.h"
#import "Colours.h"
#import "UIImage+YY.h"
@implementation YYMusicCell
//返回一个cell
+(instancetype)cellWithTableView:(UITableView *)tableView
{
static NSString *ID=@"ID";
YYMusicCell *cell=[tableView dequeueReusableCellWithIdentifier:ID];
if (cell==nil) {
cell=[[YYMusicCell alloc]initWithStyle:UITableViewCellStyleSubtitle reuseIdentifier:ID];
}
return cell;
}
-(void)setMusic:(YYMusicModel *)music
{
_music=music;
self.textLabel.text=music.name;
self.detailTextLabel.text=music.singer;
self.imageView.image=[UIImage circleImageWithName:music.singerIcon borderWidth:1 borderColor:[UIColor skyBlueColor]];
}
@end
YYMusicsViewController.m文件
//
// YYMusicsViewController.m
// 20-音频处理(音乐播放器1)
//
// Created by apple on 14-8-13.
// Copyright (c) 2014年 yangyong. All rights reserved.
//
#import "YYMusicsViewController.h"
#import "YYMusicModel.h"
#import "MJExtension.h"
#import "YYMusicCell.h"
@interface YYMusicsViewController ()
@property(nonatomic,strong)NSArray *musics;
@end
@implementation YYMusicsViewController
#pragma mark-懒加载
-(NSArray *)musics
{
if (_musics==nil) {
_musics=[YYMusicModel objectArrayWithFilename:@"Musics.plist"];
}
return _musics;
}
- (void)viewDidLoad
{
[super viewDidLoad];
}
#pragma mark - Table view data source
/**
*一共多少组
*/
-(NSInteger)numberOfSectionsInTableView:(UITableView *)tableView
{
return 1;
}
/**
*每组多少行
*/
-(NSInteger)tableView:(UITableView *)tableView numberOfRowsInSection:(NSInteger)section
{
return self.musics.count;
}
/**
*每组每行的cell
*/
-(UITableViewCell *)tableView:(UITableView *)tableView cellForRowAtIndexPath:(NSIndexPath *)indexPath
{
YYMusicCell *cell=[YYMusicCell cellWithTableView:tableView];
cell.music=self.musics[indexPath.row];
return cell;
}
/**
* 设置每个cell的高度
*/
-(CGFloat)tableView:(UITableView *)tableView heightForRowAtIndexPath:(NSIndexPath *)indexPath
{
return 70;
}
/**
* cell的点击事件
*/
-(void)tableView:(UITableView *)tableView didSelectRowAtIndexPath:(NSIndexPath *)indexPath
{
//取消选中被点击的这行
[tableView deselectRowAtIndexPath:indexPath animated:YES];
}
@end
实现效果:
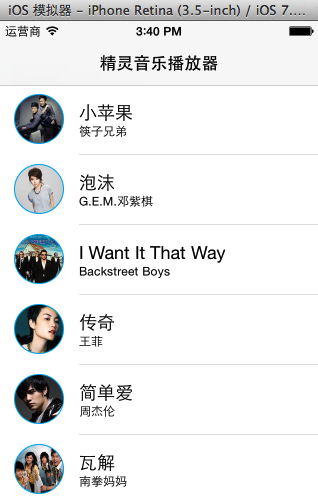
六、补充说明
需要注意的细节处理
(1)UIImageView的分类,方形图片剪为圆形
(2)颜色的处理,文章中推荐的颜色处理框架提供了大量的颜色。
(3)取消选中被点击的这行cell.
[tableView deselectRowAtIndexPath:indexPath animated:YES];
(4)tableViewCell的封装
七、跳转
1.跳转到音乐播放界面的方法选择
(1)使用模态跳转(又分为手动的和自动的)
(2)使用xib并设置跳转
2.两种方法的分析
可以使用模态的方法,添加一个控制器,让这个控制器和音乐播放控制器类进行关联,脱线,设置标识符且在cell的点击事件中执行segue即可。
步骤说明:
(1)在storyboard中新拖入一个控制器,然后设置和playing控制器类相关联。

(2)设置手动跳转
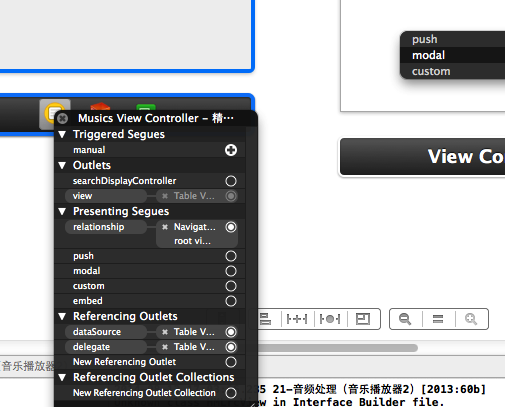
(3)设置segue的标识符
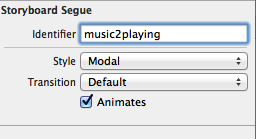
(3)跳转代码处理

不推荐使用模态的原因如下:
当选中一首音乐跳转到播放界面进行播放后,如果要跳回到音乐列表界面,那么最常见的做法是在音乐播放控制器上添加一个按钮。
当点击的时候,销毁这个控制器(dismissed)。但是,控制器销毁了那么正在播放的音乐也就随之不在了。
且由于播放界面控制器的布局是固定的,因此这里选择的方法是使用xib进行创建。
3.选择的方法
新建一个xib,对应于音乐播放控制器。
xib的结构如下图所示:
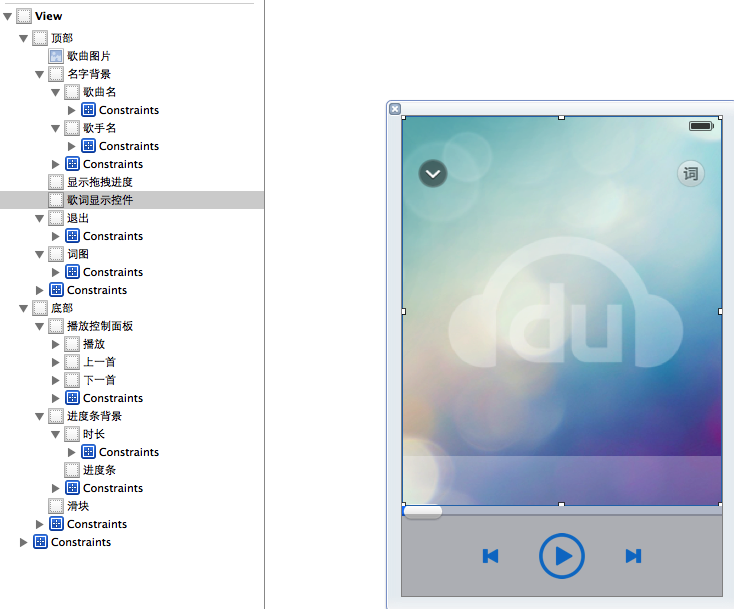
细节:控制器只需要创建一次,因此建议使用懒加载,当然也可是把播放器设置为单例
//
// YYMusicsViewController.m
//
#import "YYMusicsViewController.h"
#import "YYMusicModel.h"
#import "MJExtension.h"
#import "YYMusicCell.h"
#import "YYPlayingViewController.h"
@interface YYMusicsViewController ()
@property(nonatomic,strong)NSArray *musics;
@property(nonatomic,strong)YYPlayingViewController *playingViewController;
@end
@implementation YYMusicsViewController
#pragma mark-懒加载
-(NSArray *)musics
{
if (_musics==nil) {
_musics=[YYMusicModel objectArrayWithFilename:@"Musics.plist"];
}
return _musics;
}
-(YYPlayingViewController *)playingViewController
{
if (_playingViewController==nil) {
_playingViewController=[[YYPlayingViewController alloc]init];
}
return _playingViewController;
}
4.xib的内部细节:
(1)已经实现了约束,用于适配ios6和ios7。
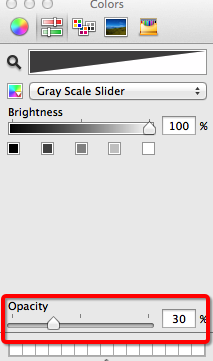
(2)设置音乐名称和歌手的View设置为半透明的,设置方法如下:
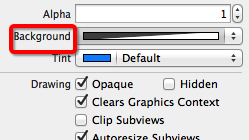
设置为30%
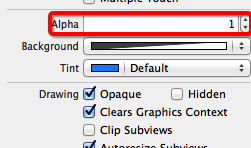
注意:不要再storyboard中控件的属性面板上设置透明度(这样的话,这个控件中的子控件也是同样的透明度)。
不推荐的做法:
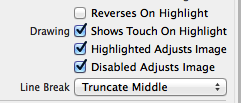
(3)按钮点击发光
(4)设置view隐藏能够节省一些性能。(参考代码)
(5)在切换控制器的过程中,设置窗口不能点击(这样做是为了防止用户多次连续的点击歌曲名会出现的问题)。
5.补充:
项目代码中拖入了UIView的分类,以方便计算frame
6.涉及到的代码
在播放控制器的.h文件中提供一个公共对象方法接口
YYPlayingViewController.h文件
// YYPlayingViewController.h
#import <UIKit/UIKit.h>
@interface YYPlayingViewController : UIViewController
//显示控制器
-(void)show;
@end
YYPlayingViewController.m文件
//
// YYPlayingViewController.m
//
#import "YYPlayingViewController.h"
@interface YYPlayingViewController ()
- (IBAction)exit;
@end
@implementation YYPlayingViewController
#pragma mark-公共方法
-(void)show
{
//1.禁用整个app的点击事件
UIWindow *window=[UIApplication sharedApplication].keyWindow;
window.userInteractionEnabled=NO;
//2.添加播放界面
//设置View的大小为覆盖整个窗口
self.view.frame=window.bounds;
//设置view显示
self.view.hidden=NO;
//把View添加到窗口上
[window addSubview:self.view];
//3.使用动画让View显示
self.view.y=self.view.height;
[UIView animateWithDuration:0.25 animations:^{
self.view.y=0;
} completion:^(BOOL finished) {
window.userInteractionEnabled=YES;
}];
}
#pragma mark-内部的按钮监听方法
//返回按钮
- (IBAction)exit {
//1.禁用整个app的点击事件
UIWindow *window=[UIApplication sharedApplication].keyWindow;
window.userInteractionEnabled=NO;
//2.动画隐藏View
[UIView animateWithDuration:0.25 animations:^{
self.view.y=window.height;
} completion:^(BOOL finished) {
window.userInteractionEnabled=YES;
//设置view隐藏能够节省一些性能
self.view.hidden=YES;
}];
}
@end
cell的点击事件中的处理代码:
/**
* cell的点击事件
*/
-(void)tableView:(UITableView *)tableView didSelectRowAtIndexPath:(NSIndexPath *)indexPath
{
//取消选中被点击的这行
[tableView deselectRowAtIndexPath:indexPath animated:YES];
//调用公共方法
[self.playingViewController show];
// //执行segue跳转
// [self performSegueWithIdentifier:@"music2playing" sender:nil];
}
